Multiple choice questions (MCQs) have been widely adopted in online quizzes for several reasons, underlining their importance.
Here are some of the main reasons why MCQs are favored for online quizzes:
1. Efficiency:
• Quick to Answer: MCQs can be answered quickly, allowing a participant to cover a broad range of topics in a short time.
• Automated Scoring: Online platforms can instantly grade MCQs, providing immediate feedback to the participant and saving time for educators or quiz creators.
2. Versatility:
• Variety of Topics: MCQs can be used to assess knowledge across a wide range of subjects and topics.
• Depth of Knowledge: While they are often used to test recall, MCQs can also be structured to assess higher-order thinking skills, such as application or analysis.
3. Objective Assessment:
• MCQs offer a consistent and objective means of assessment. Every participant encounters the same options, and there’s no subjectivity in scoring, as there might be with essay responses or short answers.
4. Feedback and Analysis:
• Online quizzes can be designed to provide immediate feedback after MCQs are answered, aiding in self-assessment and learning.
• For educators, the data from MCQs can be easily aggregated and analyzed to identify trends, common misconceptions, or areas that may require further instruction.
Just so you know
With OnlineExamMaker quiz software, anyone can create & share professional online assessments easily.
5. Engagement:
• The clear and structured nature of MCQs can help maintain participant engagement, especially in gamified or timed quizzes where rapid response is encouraged.
6. Accessibility and Inclusivity:
• MCQs can be more accessible for diverse learners, especially when combined with online platforms that support screen readers or other assistive technologies.
Table of content
- Part 1: How to make a multiple choice quiz in Google Forms?
- Part 2: Why create a multiple choice quiz with OnlineExamMaker?
- Part 3: How to make an engaging multiple choice quiz in OnlineExamMaker?

How to make a multiple choice quiz in Google Forms?
1. Access Google Forms:
• Navigate to Google Forms.
• Click on the ‘+ Blank form’ to create a new form.
2. Title and Description:
• Enter a title and a description for your quiz in the respective fields.
3. Adding Questions:
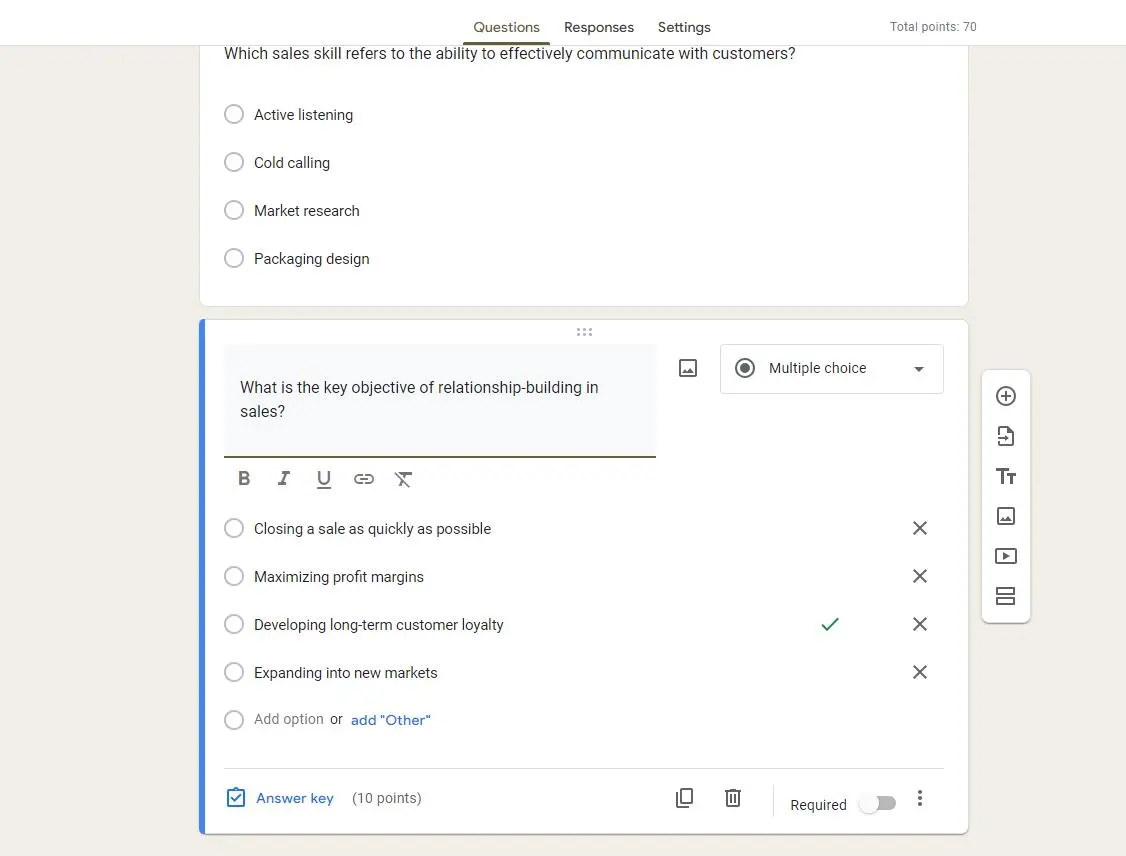
• By default, Google Forms will provide you with a multiple-choice question to start. If not, or to add another question, click on the ‘+’ button on the right sidebar.
• Enter your question in the “Question” field.
• Below the question field, you can enter the multiple-choice options. Click on the ‘+ Add option’ to add more choices. You can also add an “Other” option if you want respondents to write in their own answer.
4. Make the Question Required:
• If you want to ensure that respondents can’t skip the question, toggle on the “Required” slider at the bottom of the question.
5. Add More Questions:
• Click on the ‘+’ button on the right sidebar to add additional multiple-choice questions. Repeat the process until you’ve added all your questions.
6. Turning the Form into a Quiz:
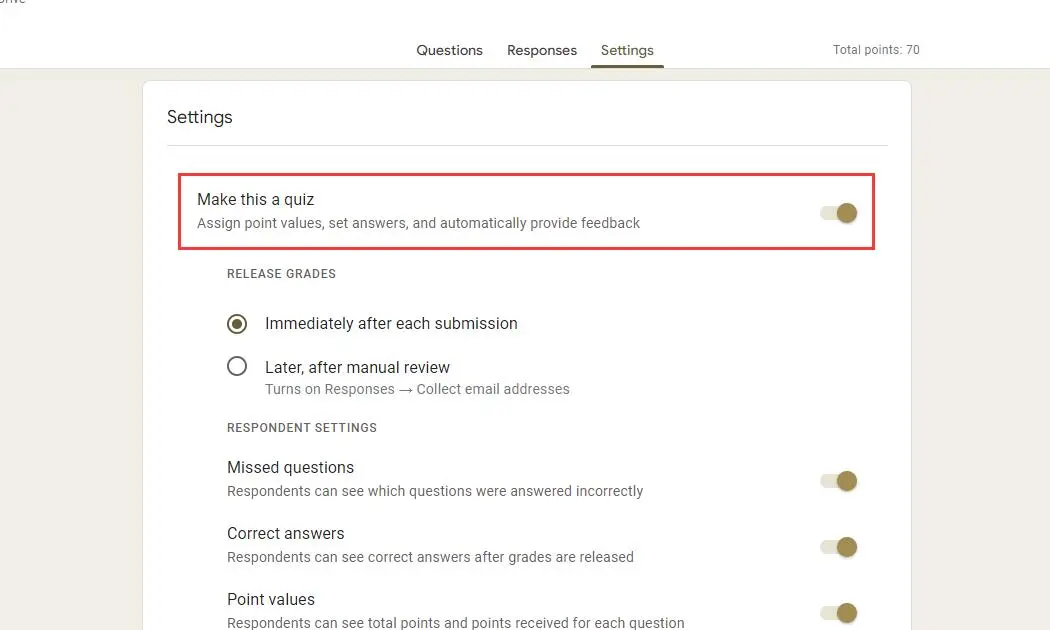
• Click on the gear/settings icon in the top right.
• Navigate to the ‘Quizzes’ tab.
• Select ‘Make this a quiz’.
• Choose your desired quiz options, like whether you want to release grades immediately or later, and if respondents can see missed questions, correct answers, and point values.
7. Set Up Answer Key and Points:
• Go back to your questions.
• For each question, click on the ‘Answer key’ option at the bottom.
• Choose the correct answer for the question by clicking on it.
• You can also set point values for each question in this view.
8. Customize the Appearance:
• To change the visual theme of the quiz, click on the palette icon in the top right. You can choose a color or select an image for the header.
9. Settings and Preferences:
• Click on the gear/settings icon to adjust general settings, presentation settings, and quiz settings to your preference.
10. Preview the Quiz:
• Before sharing the quiz, click on the eye icon at the top to preview how it will appear to respondents.
11. Share the Quiz:
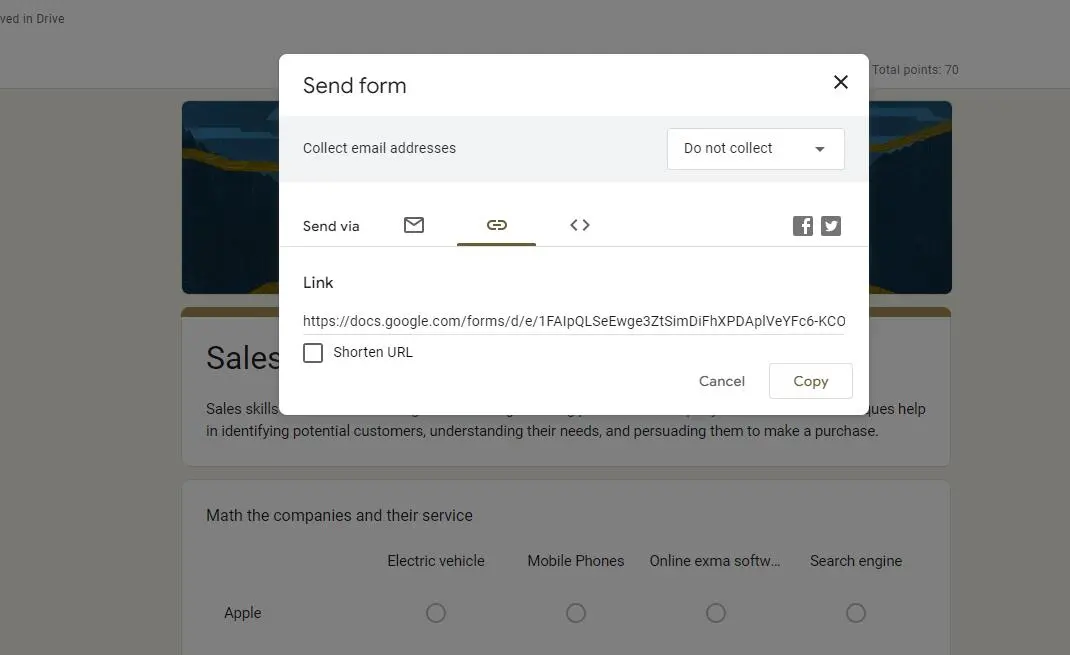
• Once you’re satisfied with the quiz, click on the ‘Send’ button at the top right.
• You can send the quiz via email, generate a shareable link, or get an embed code to embed it on a website.
Why create a multiple choice quiz with OnlineExamMaker?
OnlineExamMaker offers a diverse array of assessment options, catering to various subjects, skill levels, and industries. Educators can design a wide range of exams, quizzes, and assignments, tailored to their specific curriculum and learning objectives. The software ensures that both educators and students can get started with it effortlessly, making the assessment process seamless and stress-free.
Key Features
10 Question Types: Support up to 10 different types of questions, including multiple choice, true-false, fill in the blanks, subjective, match matrix and more.
Mathematical Equations: Allow math, physics teachers to create professional questions with mathematical equations to assess students.
Live Monitoring: Monitor and record test takers’ activities during the exam so you can review for cheating or other suspicious activities later.
Create Your Next Quiz/Exam with OnlineExamMaker
How to make an engaging multiple choice quiz in OnlineExamMaker?
Step 1: Access OnlineExamMaker Quiz Maker
Step 2: Start a New Quiz
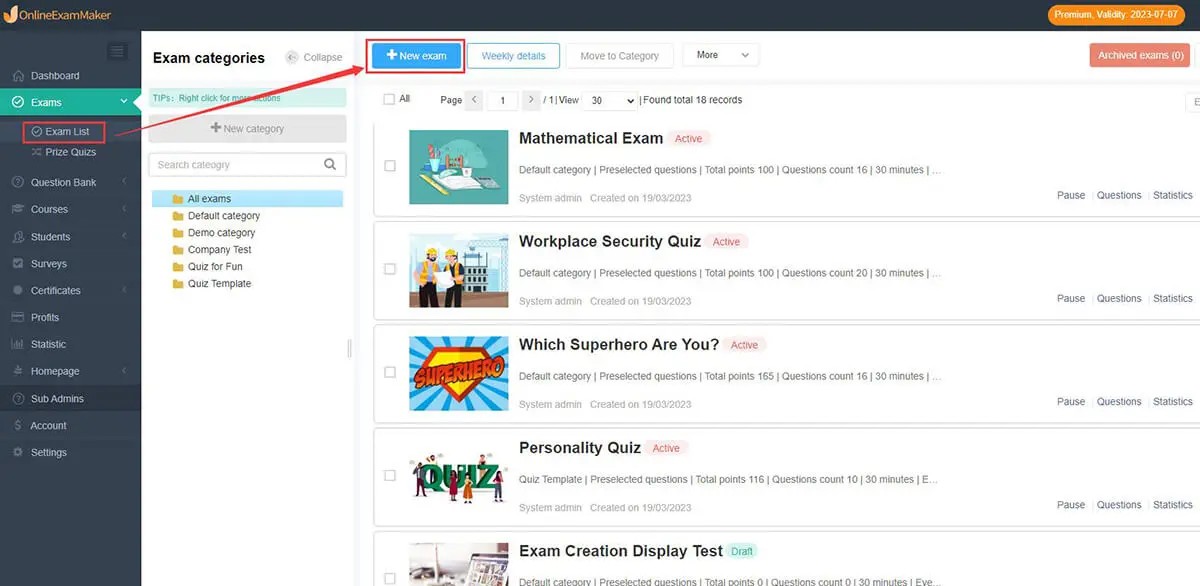
Once logged in, click on the “New exam” button to make a new quiz.
Step 3: Quiz Settings

you can customize various aspects of your quiz, such as:
Setting a time limit for the entire quiz.
Deciding if participants can review their answers.
Adjusting passing marks.
Step 4: Preview and Publish
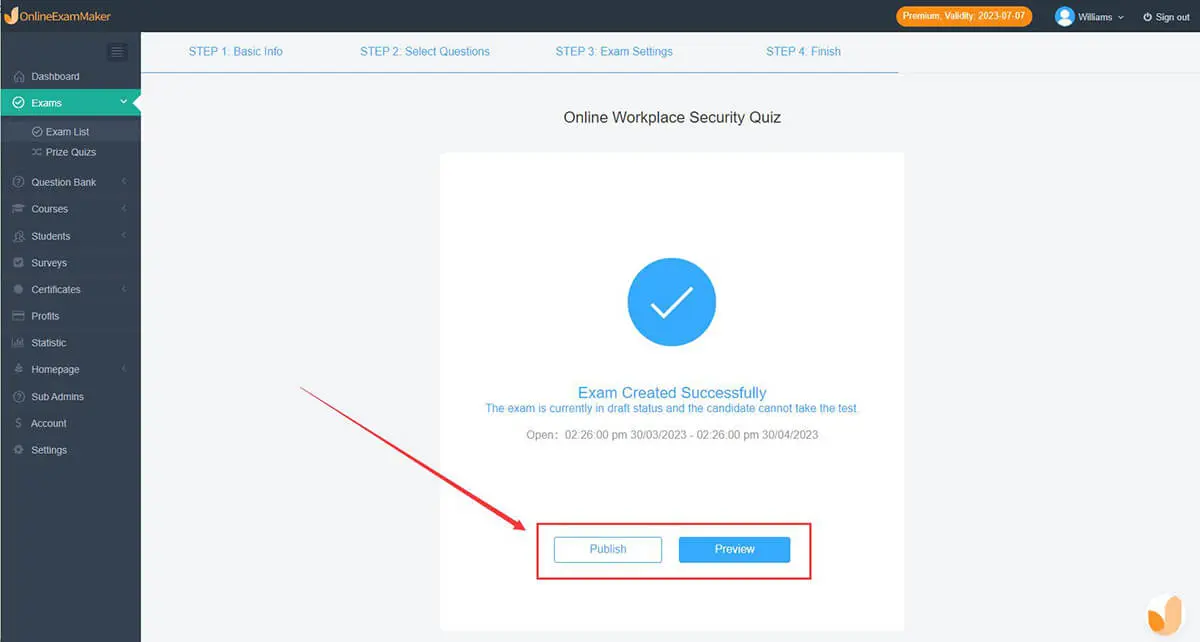
Before publishing, you can preview your quiz to see how it will appear to the participants. Once you’re satisfied, save the quiz.